
This extension allows you accept online payments in Magento 2 using the MakeCommerce/Maksekeskus Payment Gateway.
The module is Magento 2.1, 2.2 and 2.3 compatible and available for you in Magento Marketplace.
Latest version is also downloadable as .zip file directly here (ver. 100.2.6/ 2020-04-24).

MakeCommerce module for Magento 2
Overview of module functionality
1. Payment methods:
• bank-links of all major banks in Estonia, Latvia, Lithuania, Finland
• credit-card payments (Visa, Mastercard) through MakeCommerce PCI DSS
compliant card dialog (removes compliancy requirement from merchant)
• customizable payment methods presentation
• payment country selector independent from billing/shipping address
• make full or partial refunds from Magento admin interface
2. Shipping methods:
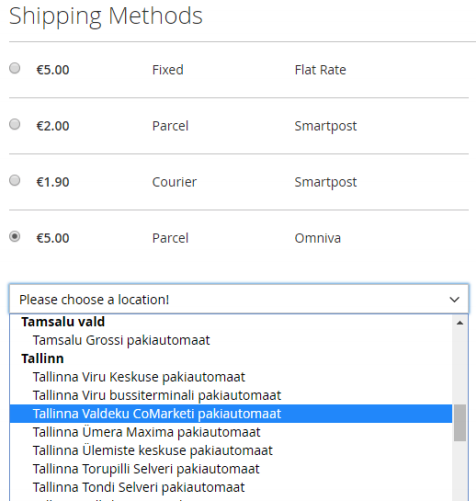
• Omniva and Itella SmartPost Parcel Machine
• Omniva and Smartpost Courier
• DPD Pickup Network
• Setting up shipping methods according to country
• Printing of package labels
Prerequisites
In order to use the services you need to sign up at https://makecommerce.net/
After sign-up your shop is given credentials for API integration that are needed for the module to work.
(you can also test out the module without signup, using test-shop credentials). It is necessary to conclude contracts with used suppliers for the use of shipping methods.
How to install
Follow the regular Magento 2 extension installation procedure.
One random tutorial link: installing-extensions
How to configure payment methods
The module installation adds a payment method “Makecommerce” that you can enable and configure.
API keys
First you need to put in Maksekeskus API credentials for your Shop. Go to Stores > Configuration > Sales > Makecommerce API.
The API credentials are made available for you in Maksekeskus Merchant Portal (Settings > API).
Note that we have also a separate Test Environment, and you may ask us to create also an account for you in the Test Environment.
You can put into the Module configuration API keys of both Live and Test environments and switch between them.

Storefront UI settings
Once you have put in the API credentials, got to Stores > Configuration > Sales > Payment Methods. You can then further fine-tune the UI settings in the module configuration to find the best combination for your shop layout.
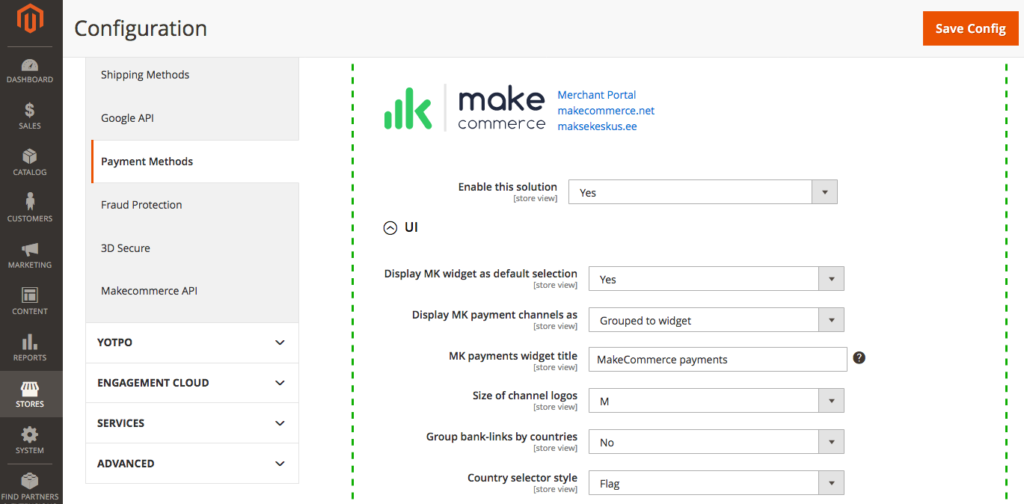
Widget vs List
There are two presentation modes for the payment options:
- Widget – all methods are presented in compact multi-row block. This is the default way.
- List – each method provided by our module is presented on a separate row equally to other payment methods. Use this option if you want to use only few specific methods provided by us and want them to be listed equally aside the other payment methods you may have in the shop.
Size of Logos
The widget of payment methods is responsive and changing the size of logos dynamically regarding the size of the place available.
However you can slightly influence the size by selecting between S, M and L size setting.
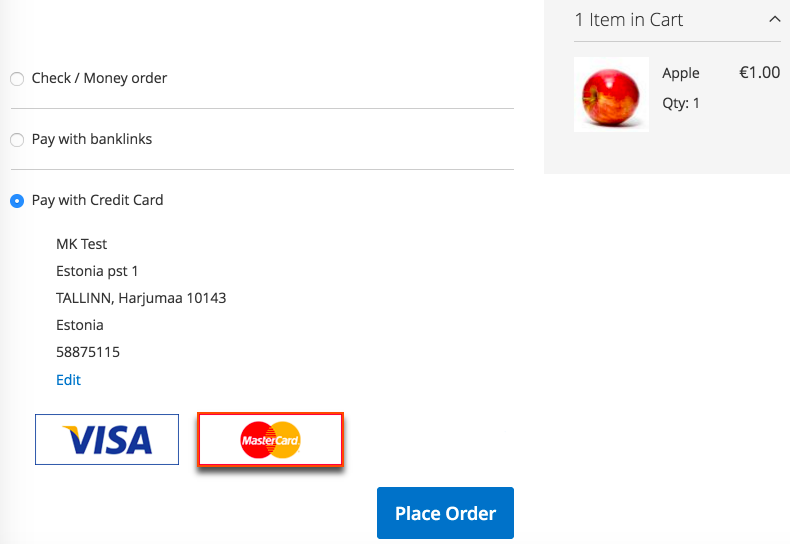
Credit cards in separate widget
You may choose to place the credit cards a bit separately from the bank-links.
This is how it looks then (also, display widget as default selection = No):
Custom order of channels
The default order of payment channels in the widget or list is defined by Maksekeskus, we try to put most popular to the most prominent place. However you can define your own order by entering comma separated list of channel-names. i.e. “lhv, coop, seb”
If your list does not include all the channels, the rest will be then listed after yours.
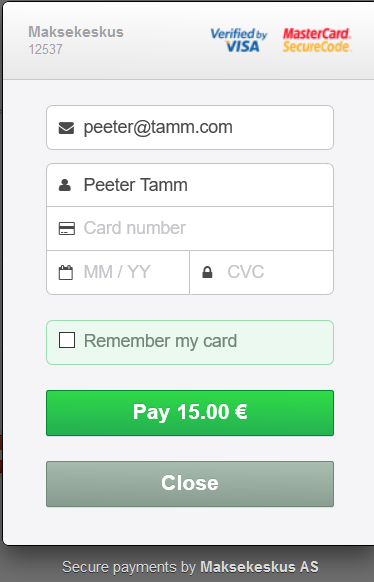
Credit Card payments
Our credit card payment dialog is built this way that the sensitive card data input goes in iFrame directly to our backend systems. The card data does not pass your systems and thus your systems are not subject to PCI DSS compliancy.
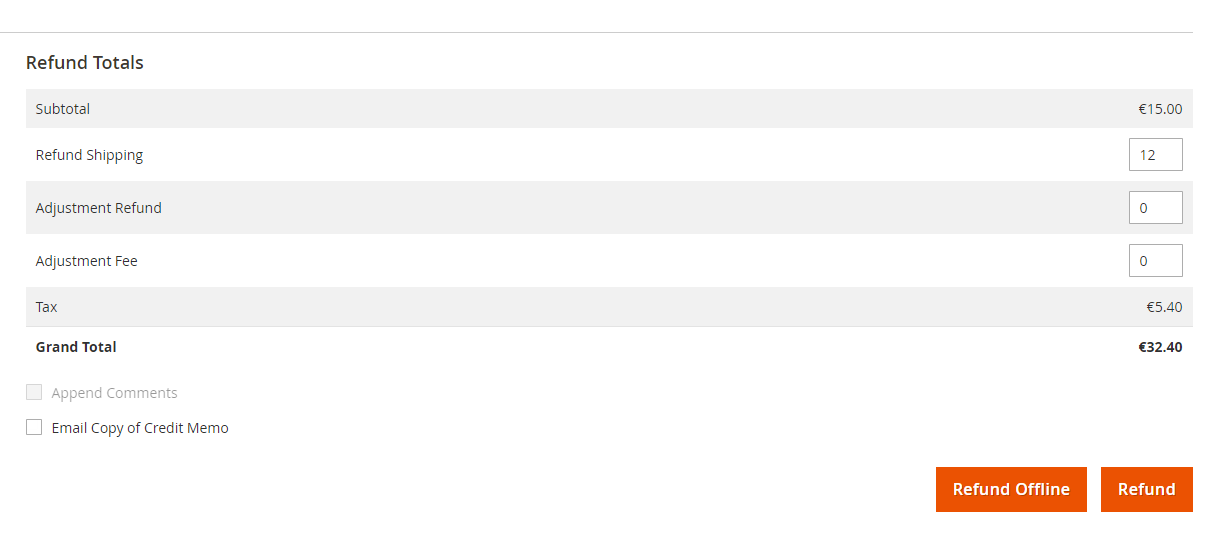
Refunds
You can also do refunds to payments made through our Payment Gateway right from Magento store admin interface.
You will find the “Refund” button in Credit Memo dialog of an Order’s Invoice.
See more information about Refunds.
How to configure shipping methods
The module installation adds a shipping method “Makecommerce” that you can enable and configure. To integrate the shipping module you need to sign a contract with the shipping provider (Omniva, Itella, DPD).
API keys
Similarly to configurating payment methods, first you need to put in API credentials that you received from shipping provider. Go to Stores > Configuration > Sales > Makecommerce API to integrate Makecommerce shipping modules. Enter username and password and fill out the return address. NB! Return address for Omniva must contain a valid mobile number with country code (e.g +372)!
Shipping settings
After inserting API credentials, you can activate Makecommerce shipping methods from Stores > Configuration > Sales > Shipping Methods.
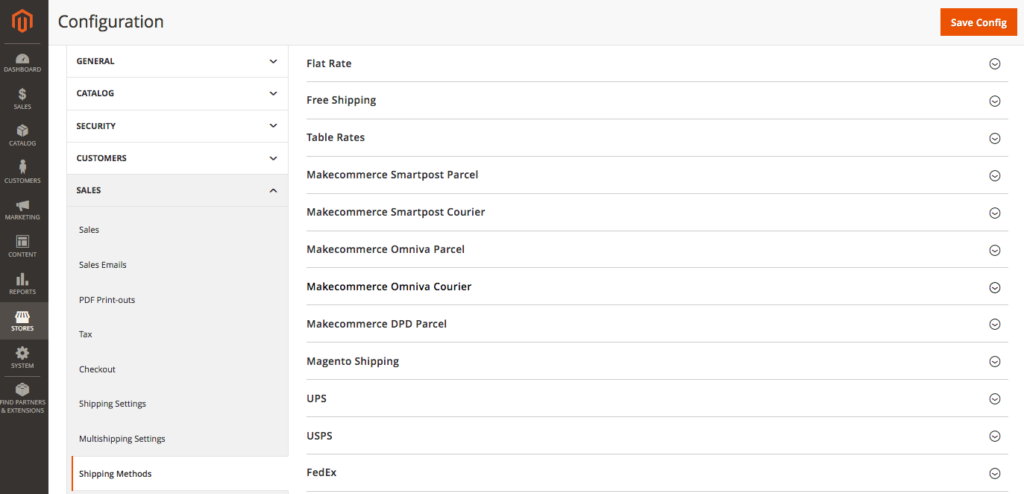
After this a list of parcel machines is added to the store’s checkout page. You can update the list from Stores > Configuration > Sales > Makecommerce API > Update Shipping Locations.
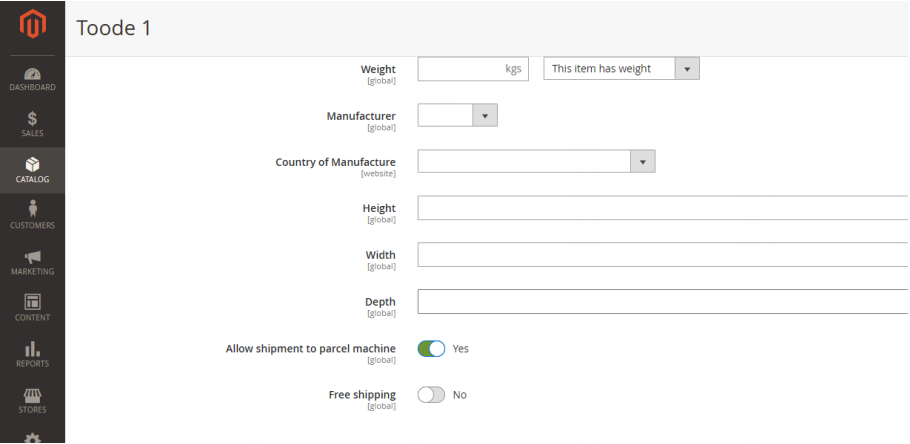
It’s also possible to mark some of your products as “not suitable for Parcel Machine shipment”. Or mark that the product is entitled to free shipping in parcel terminal (if it is the only product in cart).
Integration with SmartPost, Omniva and DPD
The module can automatically create shipments into smartpost.ee and omniva.ee systems when the order has been paid.
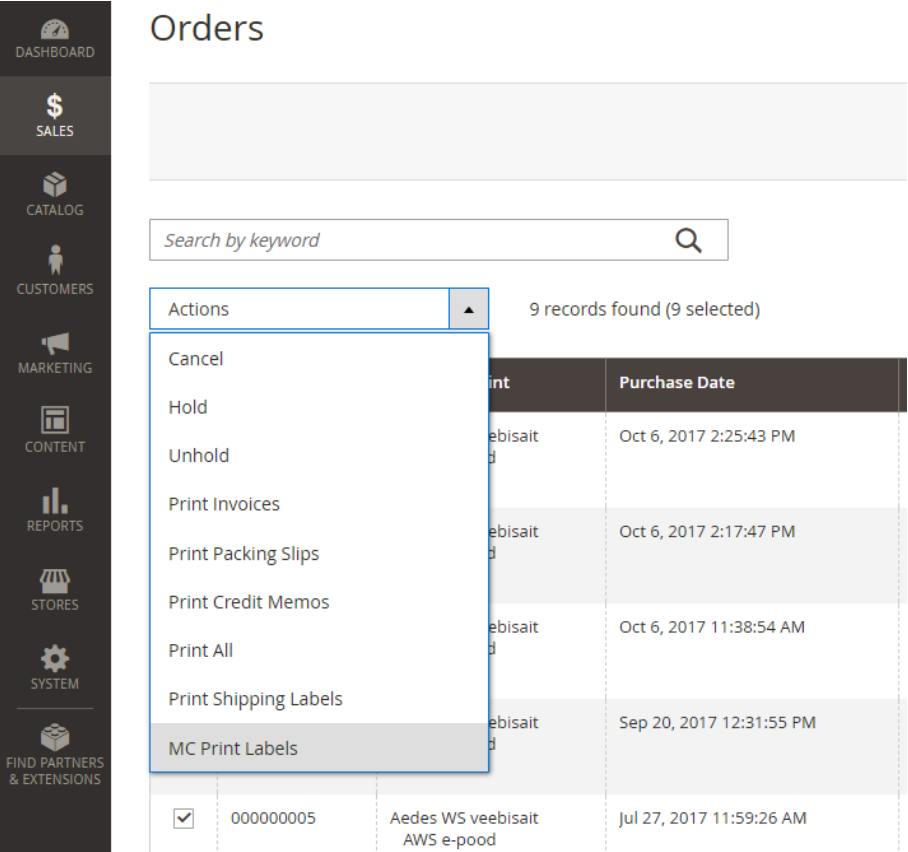
Once this automation is activated you can print out the package labels right form the shop administration panel (orders view).
You can select all orders in processing state and with one click print out Omniva, Smartpost and DPD shipment labels mixed. Choose “MC Print Labels”.
For this to work you have to sign up and create user accounts for your business at omniva.ee and smartpost.ee and then configure the plugin with username and password of those accounts.